Moda fabric treasure

Monday, 31 January 2011
OUCH
Sorry folks nothing creative today, I have had an unexpected tooth extraction....& another one is also going to be pulled out soon. In the hopes that this will solve the pain I am in x
Sunday, 30 January 2011
COLOURCRAFT TRANSFER PAINT

They seem to dry very much quicker than the Deka & they also seem a little thicker
There are 12 Colours & the image above shows all the colours. You can mix the colours as well, although as they dont appear the same when on the paper as the colour they transfer to, it is a little hit & miss as to the final colour you get. Thats not a problem with the paints, it is experience to know how much of each colour to mix.
So I am going to use them directly from the pot, for this series of mini workshops


This fabric can be bought very cheaply all over the world, I googled (funny word) white polyester satin & lots of places came up.
You could use the lining from clothes type polyester, as long as it is a light colour

I have done some work with the TRANSFIXas promised, but am scooting off to bed now, hopefully I will get time tomorrow to post the Transfix results
Friday, 28 January 2011
WOO HOO

Ok so hands up who else has had a fab evening watching MARK KNOFFLER on BBC Four...woo hoo.......
Wednesday, 26 January 2011
REQUEST
Hi all
I have a small request to ask you. Could you put LINK to my blog from your blog or website or could youtell someone else about my blog please?
It will be very interesting to see what might happen. As we are one big creative community it would be nice to get a 'ball rolling' and see where it takes us.
Back tomorrow with more TRANSFER PRINTING details. Hope your supplies are beginning to arrive now. If you can find suppliers near you then please either email me or leave a comment & I will try to help
shelaghfolgate@aol.com
Monday, 24 January 2011
THE LIZARD ...TRANSFER PRINTING WITH STENCILS

Hi. Back at last with the next part of the TRANSFER CRAYON WORKSHOP
STENCILLING WITH CRAYONS
What you need:
Transfer crayons
A commercial stencil or cut your own. Sometimes you can get these for free on card magazines
Thin computer paper 80gsm
Masking tape or sellotape
The stencil of the lizard has been cut from MYLAR. You can do this with a SCALPEL or with a soldering iron
You must leave BRIDGES or the stencil will fall apart
Tape your stencil onto the paper (remember it will transfer in REVERSE) WITH MASKING OR SELLOTAPE.
The Lizard picture above shows the use of the crayons. First the GREEN. You pull the crayon from the stencil over the edge onto the paper
Look at the claws.
I coloured int he body to look like scales

I coloured the eyes in RED

Here is the Lizard transferred onto polyester / cotton fabric.
How you do this is in the instructions on www.3creativestudios.com/blog Follow the links to the FREE workshop
When you have viewed the workshop there are 2 workshops for sale on http://shelaghfolgate.bigcartel.com
Soon there will be an advanced workshop, I have held this back to allow you to buy your crayons / paints / dyes & play with them
The next part of this workshop will be with using TRANSFER PAINTS
So come back soon to view that
By the way my workshops now include 2 PDF files one with all the photographs & one with just the words to save you ink when printing
Enjoy your stencilling
Dont forget you can purchase products from http://www.colourcraftltd.com/
Sunday, 23 January 2011
NEW FOLLOWERS & VISTORS

Hi & a special welcome to my new followers & visitors. I hope you are enjoying reading the previous posts. It is 2 1/2 years since I started this blog, life in that time has had its ups and downs mainly due to health problems, but everyone suffers from those from time to time. Creatively I had a period last year where my muse went on holiday, but mostly has been an up. Over the last few weeks I have been very busy & it has been exciting to be part of the 3creativestudios for this current month. This last week has been manic & I hoped to post each day with the TRANSFER PRINTING instructions. However after being absent without leave lol I am now back & will continue with the creative instuctions, including using the new transprint over the coming weeks. Today has been a relaxing day with my family and away from the studio. I am waiting to watch Larkrise to Candleford & doing a bit of surfing whilst waiting, after a dreadful nights wake, cant call being up 6 times and having a nightmare sleep. I am looking forward to tomorrow with my level 3 city and guilds students creating manipulated stitched pieces, they are a very creative group & work so well together.
Hope I get some sleep tonight!
Thursday, 20 January 2011
NEW PRODUCTS & CHARLOTTE

HI. I hope that the transfer products that you may have ordered are begining to arrive, if not then please have a look below
I want to draw your attention to this site. This is a direct link to COLOURCRAFT LTD & their page with the TRANSFER PAINTS on. This company have provided me, very kindly, with their product, which is excellent.
They ship worldwide
This is the direct link to the TRANSFER CRAYONS
and this is the link to the DISPERSE DYES
There is also a product called TRANSFIX, which enables the use of these products onto COTTON fabric.
I will be blogging about TRANSFIX in a post later in the month, so please check back
There will be further detailed posts on transferring soon.
The image is of CHARLOTTE the cat who lives in a cardboard box in our garden!!
Please read previous blogs about her
This is a lovely picture, such a little cutie
Back soon :-)
Tuesday, 18 January 2011
WHAT TO DO WITH THE COLOURED SHEETS


I have a huge flower PUNCH, any punch will do as I am using 80gsm ordinary computer paper, it punches really well


I glued the flowers to another sheet of paper. This base paper needs to be really thin, even finer than 80gsm is a big help when transferring


All the details of how to transfer are on 3CS click this link, there is a FREE pdf file. Further instructions are available from my shop
or my ETSY shop
Back soon with more ideas
Monday, 17 January 2011
TRANSFER CRAYONS - MORE IDEAS
Welcome back, I hope that you enjoyed the tutorial yesterday. If you have problems finding TRANSFERRING PRODUCTS then please either leave me a comment on here or email me on shelaghfolgate@aol.com
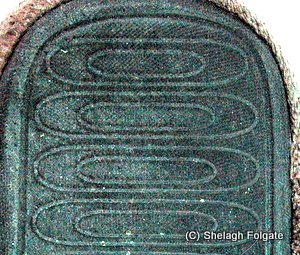 Guess what this is? It is the sole of my SLIPPER

TRANSFER CRAYON - RUBBINGS - PART 2
Grab a piece of paper & lets go on a hunt for TEXTURE
- Go around your home or garden & feel for anything that has a raised, bumpy feel
- Lay your paper over it & RUB the crayons
- I try to keep to HOT COLOURS or COLD COLOURS
- HOT COLOURS ARE - Magenta, Orange & Yellow & Burnt Sienna
- COLD COLOURS ARE - Blue, purple, black
- Green can fall into either as it is limey sort of green in the CRAYOLA transfer crayons
By the way - this method WILL NOT WORK with ordinary crayons.
Here I have rubbed over the slipper sole with magenta, yellow & orange
Check back soon for what to do with this.........
Sunday, 16 January 2011
WELCOME TO VISITORS FROM 3CREATIVESTUDIOS

GUEST ARTIST FOR JANUARY 2011 - SHELAGH FOLGATE
TOM - TECHNIQUE OF THE MONTH = TRANSFER PRINTING
OVER ON 3CS there is a FREE TECHNIQUE & an offer of a reduced price workshop - check it out - its FREE
Then please return here: Below is a TUTORIAL on using TRANSFER CRAYONS
In addition there will be further tutorials on using TRANSFER PAINTS & DISPERSE DYES & FABRIC CRAYONS
Including a special deal for 3CS members
Coming soon is TRANSFER PAINTING - TAKING IT FURTHER - add my site as a favourite to see the launch of this workshop
USING TRANSFER CRAYONS TUTORIAL
AT THE TOP OF THIS POST IS AN IMAGE OF WINNIE THE POOH
I found a copyfree image & crayoned in the colours, exactly the same as with normal crayons, colour within the lines. Then outline the edges with black.
- The crayons can be shapened with a normal pencil sharpener or with a craft knife
- Make sure that you get rid of any 'bits' of crayon from your image especially around the edges - remember that EVERYTHING - even little bits will transfer & large bits will make BLOBs
TRANSFER PRINTING - WITH RUBBINGS
 Create a RUBBING BOARD. TO DO THIS USE stiff CARD OR CARDBOARD. CUT a base board to the required size
- CUT shapes - use basic geometric shapes to start with - out of thick stiff card.
- GLUE these shapes to the base board
- Leave to dry

- Lay a sheet of scrap paper onto a flat surface
- Lay your rubbing board FACE UP on top of the scrap paper
- Lay chosen transfer paper on top of the rubbing board & using masking tape secure the transfer paper to the scrap paper
- The image shows the CRAYOLA crayons & the taped paper & rubbing board
For this tutorial I have chosen to use the following colours , in this order
, in this orderBLUE random squiggles

PURPLE tighter squiggles

Black heavy squiggles, this is now defining the shapes
I then added YELLOW around the shapes
Below is the transferred image on the left hand side & the coloured paper (in reverse) on the right hand side
I have transferred to 100% polyester satin cream fabric
I then added YELLOW around the shapes
Below is the transferred image on the left hand side & the coloured paper (in reverse) on the right hand side
I have transferred to 100% polyester satin cream fabric

STUNNING & JUST FROM A FEW CRAYONS

Dont forget to sign up on 3CS, have a look at my workshops & return here for further tutorials
Also please read (and join:-) THE SMASHEES, a series of 8 E Pattern workshops. On joining you will receive December & January FULL workshops, the other arrive one a month until July
Sign up on http://shelaghfolgate.bigcartel.com/
Friday, 14 January 2011
ANNOUNCEMENT NUMBER TWO
TA DA........................ From this Sunday 16th January 2011 I shall be the GUEST ARTIST on 3CS - http://www.3creativestudios.com/ Visit their site on Sunday & read about me & there is a give away as well. Special price on a workshop & lots of info etc appearing on here for a WHOLE MONTH
I am so excited about this - wish me well :-)
More details tomorrow
Tuesday, 11 January 2011
ANNOUNCEMENT NUMBER ONE

AT LAST - after 2 1/2 years I have OPENED my ETSY SHOP I can sell many more items in there than on bigcartel, although I am still keeping bigcartel open
I shall be selling my packs of PRE-CUT patchwork pieces & patterns through http://www.apatchshe.etsy.com/
Please head over & have a look & please 'heart' me, even if you dont want anything, then my stats will rise:-)

Friday, 7 January 2011
CONGRATULATIONS ENGLAND CRICKET

Congratulations to our lads, commiserations to Australia, a wonderful country with fab people & terrific cricketers, but we really beat you this time
BARMY ARMY.................. so today after a very few hours sleep, we had to take our car to be fixed. Bleary eyed, my car would not start, throwing it down with icy sleet my poor husband had to try & jump start my car (to bring him home from the garage) with his car (the one to be fixed), jump leads not long enough - pouring sleet, yawn, eventually we (I mean he) got it started & we set of in terrible weather down a dual carriageway, My little MGF was buffeted about by huge juggernauts,,,,I was not feeling quite so chipper about 4 nights of hardly any sleep then I can tell you. But we had a wonderful morning with our fantastic friends before fish & chips for lunch, a dash to the station with my DD. What a strange day
I want to welcome any new visitors from The Quilt Show to my blog, its an eclectic mix of textiles. The Smashee series of tutorial workshops is still open & we are all having huge fun forming our TRIBE
I am not on the right computer for textile images so please check back soon for more on the new fabric that I have been sent by a fabulous lady from America & update on when the ACCUQUILT GO arrives
Think I need to go to sleep now!!
Monday, 3 January 2011
BQL SKINNY SWAP
I am taking part in the BQL SKINNY SWAP challenge, organised by Kandy Newton. Each month she will set a size for a swap piece. The choice of technique & fabrics are our own. We post 2 pictures into the group folder
We can choose 5 quiltlets that we would like & Kandy will decide which one we get & who will get my piece. If no-one wants my piece then it wont be swapped :-( & I wont get one either !!
There are lots of people taking part. Unless I posted wrong it seems that I am the first one!

 The picture is my piece it is 18 inch by 12 inch portrait. Hope someone likes it!!
We can choose 5 quiltlets that we would like & Kandy will decide which one we get & who will get my piece. If no-one wants my piece then it wont be swapped :-( & I wont get one either !!
There are lots of people taking part. Unless I posted wrong it seems that I am the first one!
Sunday, 2 January 2011
PHONE

I have been tracking my daughters flight, it was facinating to see the route that the plane took & what height it flew at. Safely landed now it runs about 10 mins behind but is still amazing.

These images are what my clever phone has done. I played around with it to see what it would do & discovered these 2 functions. The first picture is a mirror image & the second reverse the colours. They look fabulous printed out on the POGO. Good job that I got 80 sheets of paper for Christmas.
ROSEY ROSEY half price offer only open until 8th January 2011. Get your copy now. I shall be opening my ETSY shop this week hopefully so watch out for that announcement & the other BIG announcement is coming.............
Subscribe to:
Posts (Atom)